DoHzel Proxy Installation Guide for Raspberry Pi#
Introduction#
This guide provides instructions for installing DoHzel Proxy on a Raspberry Pi (RPi).
Minimum Raspberry Pi Requirements#
- Model: Raspberry Pi 3 B or higher
- RAM: 2 GB recommended
- SD Card: 64 GB minimum
Preparing the Raspberry Pi#
SD Card Preparation#
For Windows or Linux: Format the SD card using the exFAT file system. Ensure that you use the normal formatting mode, not the quick format mode.
Troubleshooting (Windows)#
If formatting the SD card fails using the Windows GUI, you can try formatting it via the command line in admin mode. Refer to this guide: Format SD Card Using CMD.
Installing Debian on Raspberry Pi#
Installation Steps#
-
Install Raspberry Pi Imager: Download and install the Raspberry Pi Imager software from Raspberry Pi Software.
-
Launch Raspberry Pi Imager: After installation, open the Raspberry Pi Imager software.
-
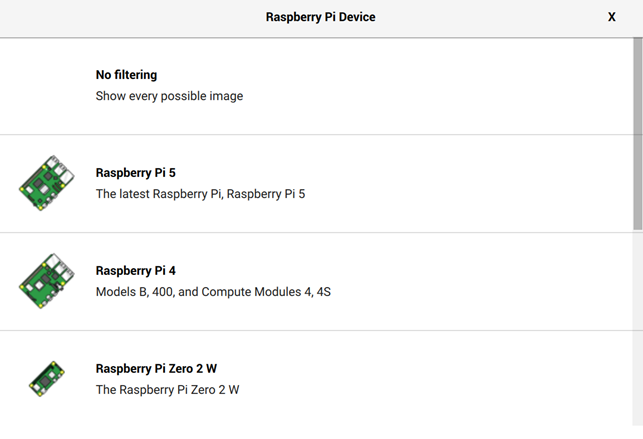
Choose Your Device Type:
-
Select OS Type: Choose "Raspberry Pi OS (64-bit)".

-
Select SD Card and Install OS: Select your SD card and proceed with the installation of the OS.
-
Customization Settings: During installation, you can insert configuration settings. It is recommended not to set up wireless LAN, as using a wired connection ensures better performance and avoids potential wireless disconnections.
Troubleshooting#
If you receive an error message asking to "add rpi-imager.exe and fat32format.exe to the list of allowed apps," it may be due to Controlled Folder Access being enabled. This issue is common on Windows 11, preventing even the formatting of the SD card as FAT32. To resolve this:
- Press Start, type "Controlled Folder Access," and open it.
- Allow the necessary apps through Controlled Folder Access to proceed.
Installing DoHzel Proxy#
Initialization#
-
Download the application: Run the following commands as the root user:
cd /root wget https://download.hafnova.com/dohzel-proxy/dohzel-proxy.linux-arm64-latest.bin chmod +x dohzel-proxy.linux-arm64-latest.bin -
Install as a systemd service: It is recommended to install DoHzel Proxy as a systemd service:
./dohzel-proxy.linux-arm64-latest.bin service -
Initialize configuration files: Initialize the local configuration files:
./dohzel-proxy.linux-arm64-latest.bin init -
Enroll devices: Enroll your devices to receive security updates from ThreadDB:
./dohzel-proxy.linux-arm64-latest.bin enroll
Status Verification#
To check the status of your DoHzel Proxy installation at any time, use the following command:
./dohzel-proxy.linux-arm64-latest.bin status
Server Launch#
- If installed as a systemd service, start the server with:
systemctl start dohzel-proxy.service - For standalone mode, launch the server with:
dohzel-proxy server