DoHzel Proxy Installation Guide for Microsoft Windows#
Introduction#
This guide provides detailed instructions on how to install and configure DoHzel Proxy on a Windows system. This version of DoHzel Proxy is also designed to be used on client machines. This can be useful if you want to perform a large-scale deployment on multiple computers without requiring any graphical interface administration. The program will be installed and will function as a service.
Note on Windows DNS Leaks#
It is well known that Microsoft Windows natively implements the DoH (DNS Over HTTPS) protocol. This service can be configured directly from the network settings. However, Microsoft's implementation does not fully adhere to the DoH protocol standards, which are intended to guarantee client privacy and integrity by systematically encrypting DNS requests. Unfortunately, under certain conditions, Windows tries to optimize the connectivity and leaks unencrypted DNS requests to DNS servers.
From our perspective, this poses a significant risk to the client as it can lead to more serious security issues, as well as potential operational problems. We recommend that Windows users evaluate their risks before using native DoH implementation and favor DoHzel Proxy. The latter ensures privacy and integrity of the client at all times, as no DNS leaks will occur.
This DoH leakage impacts Windows Server, Windows 10 and Windows 11, including the most current 24H2 version.
Prerequisites#
DoHzel Proxy has been successfully tested on the following Windows systems:
- Windows Server 2022/2024/2025
- Windows 10/11
Installation#
Download#
You can download the appropriate version of DoHzel Proxy using the following links:
- DoHzel Proxy (Windows x64) - Suitable for 64-bit Windows systems.
- DoHzel Proxy (Windows arm64) - For Microsoft Windows ARM-based systems.
Be aware that some antiviruses may wrongly consider DoHzel Proxy as a security threat and delete it.
Initialization#
Once you have downloaded the appropriate version of DoHzel Proxy for Windows, you need to open PowerShell as an Administrator (provide instructions on how to do this) and navigate to the directory where DoHzel Proxy was downloaded.
.\dohzel-proxy.windows-x64-latest.exe init
This command will initialize and install DoHzel and its configuration on the system in C:\Program Files\Hafnova\DoHzel-Proxy.
DoHzel relies on the 9.9.9.9 DNS resolver to bootstrap its installation. It is possible that access to this resolver is blocked. This may result in an error stating that api.hafnova.com cannot be reached. In this case, the initier should be provided as in the example below.
.\dohzel-proxy.windows-x64-latest.exe init -initier 192.168.0.1
Note on Permissions#
By default, the installer on Windows allows users to configure the DoHzel Proxy server, though it restricts their ability to make significant changes. If you want to prevent users from altering the configuration, you can initialize the environment with restricted permissions by adding the --no-grant option during installation:
.\dohzel-proxy.windows-x64-latest.exe init --no-grant
This option ensures that users will not have the ability to modify the configuration of the DoHzel Proxy, enhancing security and maintaining control over the system setup.
If you have already initialized DoHzel Proxy without using the --no-grant option, running the initialization command again with this option will not have any effect. To apply the restricted permissions, you will need to reinstall DoHzel Proxy. First, uninstall the current installation by deleting C:\Program Files\Hafnova\DoHzel-Proxy
Afterward, you can proceed with the installation again using the --no-grant option to prevent users from modifying the configuration.
Device Enrollment#
After DoHzel is installed, you must enroll your device with Hafnova's threat intelligence platform.
.\dohzel-proxy.windows-x64-latest.exe enroll
Optionally, you may want to align the device name in DoHzel with the computer's name.
.\dohzel-proxy.windows-x64-latest.exe enroll -name $env:COMPUTERNAME
Join Profile#
If you already have a profile with a token, you may use it to link the device to the profile:
.\dohzel-proxy.windows-x64-latest.exe profile join <PROFILE_TOKEN>
Windows Service#
You can use DoHzel in standalone mode or as a service. The following command installs the DoHzel service, ensuring it runs continuously.
.\dohzel-proxy.windows-x64-latest.exe service install
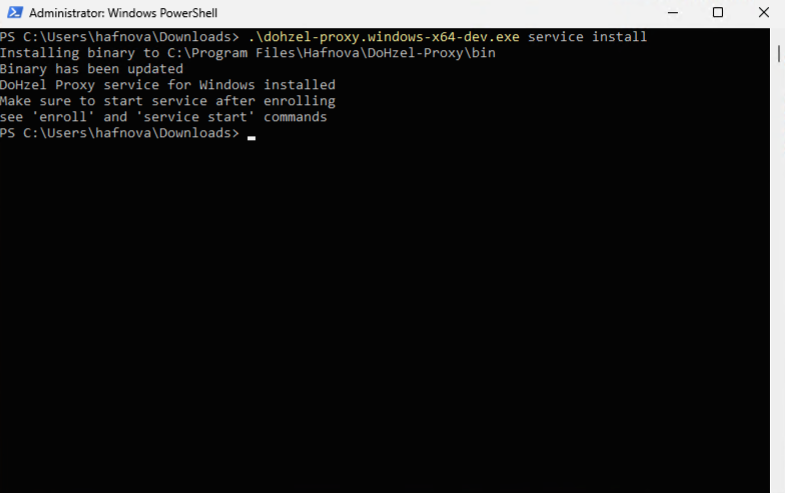
It is highly recommended to use the Windows service as explained above. However, if for some reason you need to run it in standalone mode, you can execute the following command to simply launch the DoHzel server:
.\dohzel-proxy.windows-x64-latest.exe server
Managing the Service#
Start the service from the command line.
.\dohzel-proxy.windows-x64-latest.exe service start
Should it be needed, the service can be stopped with the following command:
.\dohzel-proxy.windows-x64-latest.exe service stop
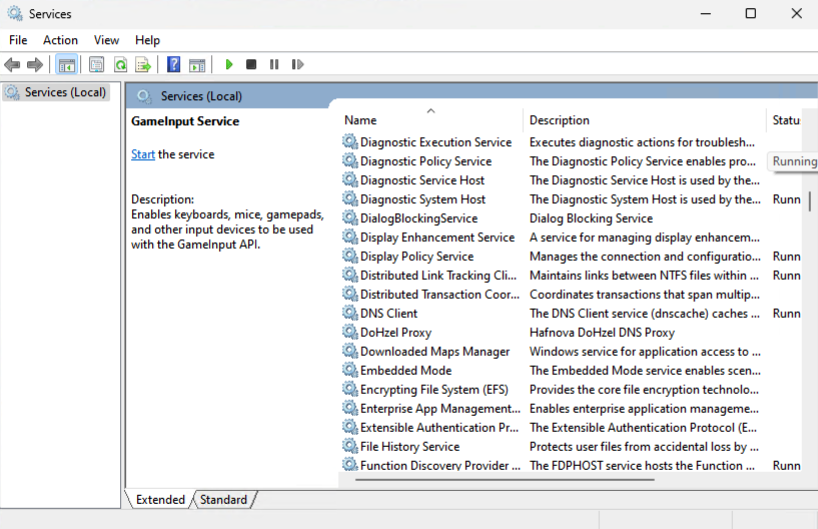
You can control the DoHzel service via the Windows Services application, allowing you to start, stop, or restart the service.
DNS Interception#
To address the issue of DNS leaks in Windows, we have integrated a reliable mechanism that intercepts DNS requests cleanly without relying on the firewall or other indirect methods.
DoHzel Proxy includes a feature that, when activated, monitors network interfaces and forces the use of the local DNS server (DoHzel Proxy). If a user attempts to change the DNS settings, the service will restore them automatically.
This interception is easy to set up:
.\dohzel-proxy.windows-x64-latest.exe intercept set on
Likewise, you can easily disable this feature with the following command:
.\dohzel-proxy.windows-x64-latest.exe intercept set off
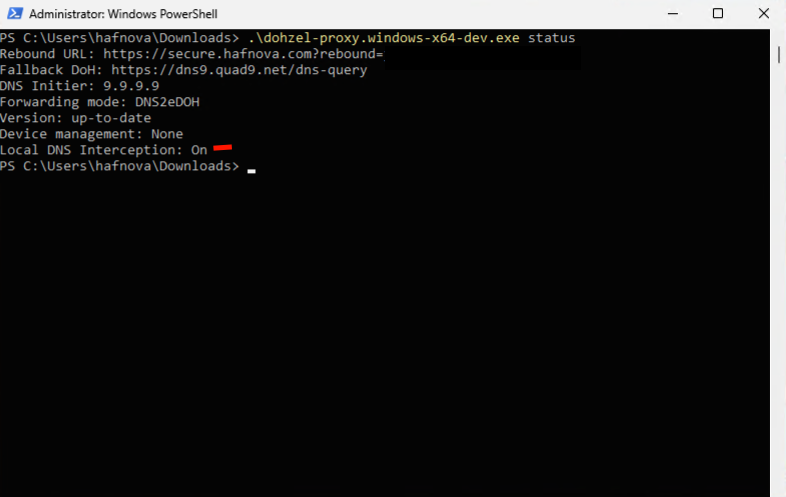
You can check the interception status by verifying the status of DoHzel Proxy:
.\dohzel-proxy.windows-x64-latest.exe status
Uninstalling DoHzel#
To uninstall DoHzel Proxy from a server or client machine, run the following commands:
.\dohzel-proxy.windows-x64-latest.exe intercept set off
.\dohzel-proxy.windows-x64-latest.exe service uninstall
Then delete C:\Program Files\Hafnova\DoHzel-Proxy